Toyota Camry (XV70): Installation
INSTALLATION
PROCEDURE
1. INSTALL NO. 2 ECM BRACKET
(a) Install the No. 2 ECM bracket to the ECM with the 2 screws.
Torque:
4.5 N·m {46 kgf·cm, 40 in·lbf}
2. INSTALL NO. 1 ECM BRACKET
(a) Install the No. 1 ECM bracket to the ECM with the 2 screws.
Torque:
4.5 N·m {46 kgf·cm, 40 in·lbf}
3. INSTALL ECM
(a) Install the ECM with the 2 bolts and nut.
Torque:
8.0 N·m {82 kgf·cm, 71 in·lbf}
NOTICE:
If the ECM has been struck or dropped, replace it.
| (b) Connect the 2 ECM connectors and rotate the 2 levers to lock them. NOTICE:
|
|
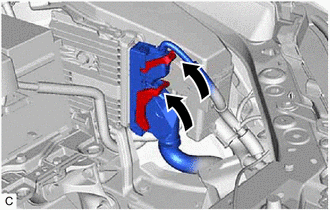
4. INSTALL AIR CLEANER ASSEMBLY WITH AIR CLEANER HOSE
Click here
.gif)
5. INSTALL INLET AIR CLEANER ASSEMBLY
Click here
6. INSTALL COOL AIR INTAKE DUCT SEAL
Click here
7. CONNECT CABLE TO NEGATIVE BATTERY TERMINAL
Click here
8. PERFORM INITIALIZATION
Click here
READ NEXT:
 Components
COMPONENTS ILLUSTRATION
*1 AIR CLEANER CAP WITH AIR CLEANER HOSE
*2 ENGINE COOLANT TEMPERATURE SENSOR
*3 VACUUM HOSE
*4 NO. 1 FUEL VAPOR FEED HOSE
*5 NO
Removal
REMOVAL CAUTION / NOTICE / HINT
The necessary procedures (adjustment, calibration, initialization or registration) that must be performed after parts are removed and installed, or replaced during en
SEE MORE:
Intake Air Temperature Sensor 1 Bank 1 Circuit Short to Battery or Open (P011015)
DESCRIPTION Refer to DTC P011011. Click here
HINT: When DTC P011015 is stored, the ECM enters fail-safe mode. During fail-safe mode, the intake air temperature is estimated to be 20°C (68°F) by the ECM. Fail-safe mode continues until a pass condition is detected, and the engine switch is then
Installation
INSTALLATION CAUTION / NOTICE / HINT
HINT:
Use the same procedure for the RH side and LH side.
The following procedure is for the LH side.
PROCEDURE 1. INSTALL PARKING BRAKE ACTUATOR ASSEMBLY
(a) Apply a light coat of lithium soap base glycol grease to a new O-ring.
(b) Install the
